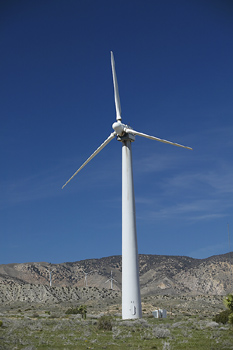
How to Build a Wind Turbine Generator
Learning how to build a wind turbine generator is only half of the project, when converting to wind power. You’ll also need to know how to mountain a wind turbine, so we’ll cover both projects in this article. Converting your home to wind generated electricity may not mean you go entirely off the energy coop, but it should lower your electricity bills and help the environment, as well.
Many people assume wind turbine generators are going to cost thousands of dollars to buy, but building your own turbine system lowers the cost into the hundreds of dollars. To start building your own wind turbine generator, all you need is a turbine blueprint, a manual, the necessary tools and components, and rudimentary building skills.
Homemade Wind Turbine
To start building a homemade wind turbine first put together the turbine assembly. Build the rotor assembly first. The rotor assembly includes the turbine blades. When the blades turn, they power the alternator in your generator, generating the electric power itself.
Convert a Recycled Motor
One option to building your alternator is to convert one from a washing machine. Alternately, you can assemble your own alternator from scratch. The materials you need for the alternator includes two magnet rotors and a stator disk.
The alternator creates alternating voltages in the electric flux as it sweeps across the magnet rotors. This is an important step in making the generated electricity usable for your home.
Building the Furling Tail

How to Build a Wind Turbine Generator
The “furling tail” is a the tail wing looking hinged tail on the bladed apparatus. The furling tail keeps the windmill pointing into the wind, so the generator produces the maximum energy. A secondary purpose of the furling tail is to make sure high winds don’t damage the machine, by angling the blade assembly away from the biggest winds.
Mount the Rectifiers and Heat Sink
Rectifiers convert the alternating current (AC) into the direct current (DC), which lets you charge a battery to power your household grid. When you mount the rectifiers on a particular piece of metal, this acts as the heat sink.
Balance the Turbine Blades
Mount the blades on your rotor by placing small weights on each blades, which helps the blades turn efficiently and smoothly when it sits in the wind. Once you finish this step, you has built your wind power turbine generator.
Mounting a Wind Turbine
Building the base of your wind turbine tower requires digging at least a 2′ hole and pouring concrete into the hole, along with steel piping. This is something you’ll need to study with the instruction manual I suggested earlier, because the last thing you need is to miscalculate the size hole and pipe diameter for the turbine size and tower height you are constructing.
Raise the Tower Pole
The wind turbine tower pole needs to be prepared next. Cut an exit hole for your turbine wiring, so it can run out of the wind turbine assembly to the ground. You need to mount the turbine on the tower pole, so the turbine catches the wind up high.
For the standard apparatus, you need at least four guy wires to support the tower pole. The higher your pole goes, the more guy wires (yes, not “guide wires”) you need for safety.
Mount the Generator
To finish the building of your own wind power turbine generator, mount your generator on the tower pole you raised. Connect rectifiers to the wires coming out of the wind turbine. Connect your power grid or batteries to the charge controller and ammeter.
Wind Turbine Generator Building Safety
When learning how to build a wind turbine generator, learn how to build a generator safely. Keep in mind that blades rotating fast enough to produce electricity is dangerous, if you aren’t careful. So whenever working with heavy equipment or working at a height, safety concerns come before everything else.
