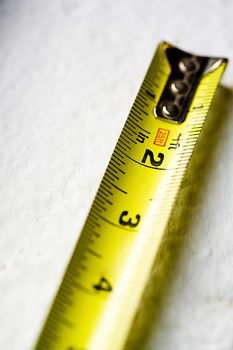
How to Read a Tape Measure
The task of reading a tape measure is not as easy as it may seem. There are loads of little lines, all standing for something and unless you have been told specifically what they all mean it can be quite perplexing. Also there are different styles of tape measures and different lengths, widths, weights and thicknesses.
A measuring tape does not only gauge one measurement but instead contains the markings for several, so in order to make this confusing task of ‘how to read a tape measure’ far easier, just follow these few simple steps.
1. Reading Inches
The inch lines are typically more prominent than the centimetres, and spaced further apart. They can also be marked in a different colour to differentiate them. Each inch will have a number by it in order to signal the full length of an inch. However, in between these will be smaller lines symbolising the smaller fractions of this inch; it will be easier to see the half and quarter inch divisions as these will be more prominent than the smallest measurements.
For example, to measure 3 and ¾ inches, you will need to mark up to the number 3 on the inches side and then you will need 3 of the quarter inch marks. It’s that simple!
2. Reading Centimeters

How to Read a Tape Measure
On the other side of the tape measure will be the markings for centimeters. Just like the inches, each full centimetre will be marked with a number and there will be smaller lines in between to signal each smaller fraction. There will be ten sections, each representing one millimeter.
For example, to measure 20.3 centimeters, you will need to measure up to the 20 mark on the centimetre side of the tape measure and then the first three little lines after.
3. Reading Feet
Although this is quite unusual, some tape measures also have the markings for feet. The marking for one foot will appear after 16 inches and just like the inches and centimetres, will be highly prominent on the strip in comparison to the smaller lines; however, the easiest thing to spot is the red square/rectangle that is typically used.
For example, to measure 1 and ¼ foot, you will need to find the first reading for one foot and then add on a further 4 inches (as one foot is equal to 16 inches, you need a quarter of this amount).
4. Measuring different surfaces
It can be much trickier to measure surfaces like material compared to wood as it will tend to move around. In these circumstances it would be advisable to employ a different style of tape measure. Rather than using a tape measure made of metallic ribbon, it would be more appropriate to use one made of cloth. In this case, you are able to pin the measuring tape to the material to avoid miss calculation! On the other hand, when measuring a hard surface like wood or metal, a metal ribbon tape measure is the most suitable.
