How to Install Vinyl Siding
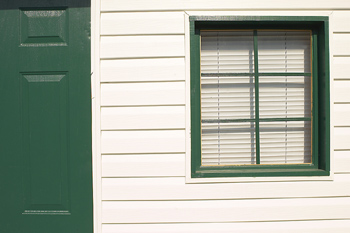
Vinyl siding is a great choice for covering your home. The main benefits of vinyl siding are its durability, the ease of maintenance, and how darn cheap it is compared to other siding alternatives. Another benefit is that learning how to install vinyl siding is an easy to understand process.
What is Vinyl Siding
Vinyl siding is made of PVC ( a chemical known in the industry as polyvinyl chloride) which is the same material used in commercial windows and even gutter materials. PVC is easy to maintain and cheap to produce, leading to its popularity. While wood siding is “naturally colored” and requires painting, vinyl siding comes pre-painted.
Installing Vinyl Siding
In order to get started installing vinyl siding first we need to inspect the product. When you pick up your vinyl siding, you’ll see that it comes in horizontal panels that have been made to look like wood siding. There will also be vertical panels. Included in the package should be trim pieces and a number of accessories meant to make installation easier.
Vinyl siding panels are twelve and a half feet long and include a flange across the top for nailing as well as a J-shaped flange on the bottom meant to interlock with other pieces of vinyl siding.

How to Install Vinyl Siding
Use the inside and outside corner posts to cover the ends of the siding panels at the corners of your walls.
As for any special tools you’ll need to install vinyl siding, you may need a nail hole punch (for prepping the siding for nails), a snap-lock punch for prepping siding panels where they will be attached to the home’s trim and an unlocking tool for separating the different vinyl siding panels.
The only really hard part of installing vinyl siding is that the PVC building material is known for expanding and contracting, even more so than other building materials. As a result, follow these easy five steps for installing your vinyl siding.
- Any time you nail on a new panels or an accessory, you should nail it in the center of the slot. This will keep the piece of siding able to move in any directions.
- Do not nail any piece of siding very tightly at all. Drive your nails as straight as you can and leave 1/16″ space between the head of your nail and the vinyl siding panel. Proper nailing means you should still be able to “shift” the panels or vinyl siding accessories a bit back and forth once they’ve been loosely nailed.
- Avoid driving a nail through the vinyl siding itself. If you need to do this, consider surrounding the hole with under-sill trim or a special nail hole punch to create a slot without damaging the vinyl.
- Remember to leave 1/4″ clearance between your vinyl siding panels where they join into the J-channels or corner posts mentioned above. Also leave this clearance at the ends of corner posts when they join with the eaves. Hot tip (or rather, “cold tip”), increase this wiggle room to 3/8″ if you’re putting in your vinyl siding in cold weather.
- Please don’t tighten up your vinyl siding panels during installation. Once these panels are locked into place, they should be hanging a bit “loose”.
Learning how to install vinyl siding is an easy weekend job and you can save tons of money by not hiring an installation company.
