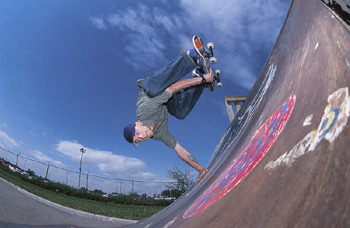
How to Build a Skateboard Ramp
Skateboarding requires a great deal of practice in order to do even the most basic of tricks such as the Ollie, heelflip and kickflip. A normal urban environment usually provides enough space and obstacles to serve as the perfect practice location. Even better is the common availability of local skate parts that offer professional ramps, rails and kick boxes to perfect your technique.
With some moderate craftsman’s skills and the proper equipment and time, a homemade mini ramp can be created to serve as a great location for sessions by yourself and with your friends.
Equipment Needed
This equipment is required to make a 24 foot length, 3 foot high mini ramp.
- 45 pieces of 8 foot 2X4 wood
- 6 pieces of 4X8 feet sheets of 3/8 inch plywood
- 6 pieces of 4X8 feet sheets of ¼ inch masonite
- 3 pieces of 4X8 feet sheets of ¾ inch plywood
- 2 pieces of 8 feet long metal pipes with a 1.5 inch diameter
- Measuring Tape
- Screw Driver
- Screws
- Sawzall
- String
- Pencil
Creating the Ramp
The first step in making a mini ramp is drawing out and cutting the ramp, also known as the transition. A start point must first be created by choosing an edge of a 4X8 sheet and drawing a point that is 12 inches in length and 3.5 inches in width.
Screw one of your 2X4 pieces in place at the drawn out 12 inch mark and place another screw on the 2X4 piece that is 6 feet and 10 inches away from that first drawn starting point. This screw will be used to tie a string that will be attached to a pencil. Make sure the pencil can reach all the way to the original starting point.
From the starting point, draw the ramp on the 4X8 sheet of plywood while keeping the string tense at all times. The sawzall will be used to cut the ramps out.
Assembling the Initial Ramp

How to Build a Skateboard Ramp
Ramp Coping
Pro ramps will have a metal pipe that runs along the top of the ramp. This can be added to the homemade ramp by cutting out a small notch at the top and setting the 8 foot long metal pipe into the notch.
Plywood Surface
To give the ramp a surface, begin laying the 3/8 inch plywood pieces lengthwise onto it. To get a smooth curving plywood surface, take your time and soak the plywood in warm water. Carefully and slowly apply your body weight until the plywood forms the proper curve.
Secure the plywood by screwing it into the support structure. You will need to do the same process with the 4X8 feet sheets of masonite. These sheets will be placed on top of the plywood to create a smoother surface on which you can skate.
Skateboard Platform
It can be very difficult to skate on a mini ramp without having a platform at the top on which you can start. If the first ramp pieces were fitted correctly, you should have a little over a foot of straight horizontal space where the ramp curve finishes.
The platform can be modified to be as big or as small as you want. Simply use some of the 2X4 pieces of wood across the top of the ramp to create the skeleton of the platform. You will need to cut them with the sawzall because you will also place two 2X4 pieces on the inside of the top ramp to extend the platform surface area.
With the skeleton secured, use a piece of the ¾ inch plywood to create a surface for your platform.
Creating a Bottom
To connect the ramps, you will need a flat bottom. Use the same principle that was used to create the ramp skeleton. Remember those 2X4s? Use those to make a flat box. Length wise, the flat bottom can be as small or as big as you want. Once again, use the 2X4s to connect the sides at every 8 inch interval.
Make the surface of the bottom with a couple of sheets of 3/8 inch plywood and top it off with sheets of ¼ inch masonite. It is extremely important to remember that the flat bottom must be attached to the ramp sections for stability. To do this, let 2 inches of plywood and masonite stick out at the length ends. This extra space can be used to screw the flat bottom surface on the ramp surface.
Completed Mini Ramp
Remember that you will have to make two ramps. This explains the need for so many pieces of 2X4. Any leftover pieces of 2X4 should be used to improve the rigidity of the ramp. Use them on the underside of the top ramp and platform to provide cross sectional support. This will prevent the ramp from bending and swaying.
