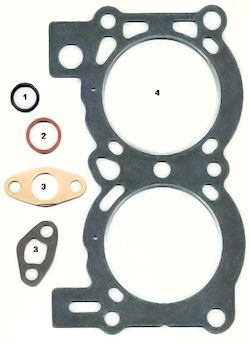
How to Replace a Head Gasket
Replace a faulty or blown head gasket immediately, since failure to do so can ruin your vehicle’s engine. A bad head gasket damages the cooling system, engine block, pistons and other vital engine components. When a gasket is blown, the engine goes soon after.
If you don’t take care of business soon, an expensive repair becomes an extremely expensive repair. So if you want a cheaper alternative, learn how to replace a head gasket yourself. Replacing a head gasket is an complicated procedure, though, which is best trusted to a certified mechanic
You should know that replacing a head gasket requires taking apart most of the engine. This is one of the biggest car repairs, short of replacing the engine. Don’t undertake these repairs, unless you know for certain you need a new head gasket. So how do you know you need the repairs?
Head Gasket Warning Signs
Signs that your head gasket needs to be replaced are white colored exhaust issuing from your vehicle’s tailpipe while the engine is running, or a thick creamy fluid in either your radiator or oil reservoir. If either of these appear, you have problems.
Unless there’s a clear cut case of a blown head gasket and you know for a fact that’s the problem, though, it’s best to have a mechanic diagnose your problem. You don’t want to go to all of the trouble to learn how to replace a head gasket, and then the further trouble of replacing a head gasket, for nothing.
As I stated above, given the complex nature of replacing a head gasket, this article serves to merely outline the steps taken in order to replace a head gasket. Our advice below is not meant to serve as step by step instructions for the aspiring home mechanic. Seek professional assistance in performing this procedure, to avoid personal injury and property damage.
Bad repairs are likely to cost you more than you would have payed in the first place. Read ahead and see whether you feel up to this task.
Head Gasket Installation
The following head gasket instructions list the steps necessary to remove and replace a head gasket. If at any point these head gasket instructions are unclear to you, please contact a certified mechanic.
In order to get at the head gasket itself, you remove the intake manifold, exhaust manifold, valve train and head of the engine, which is an involved procedure and the prime consideration of learning how to replace a head gasket. In order to do this, a multitude of sensors and other parts of that nature need to be disconnected, which can be disastrous if done incorrectly. Once this is done, the mechanic should see if the head itself is warped or damaged in some other way which has lead to either one or both of the head gaskets needing to be replaced. However, things get even trickier in the sense that they also have to examine the rest of the engine to make sure that no additional damage has been done to the engine, either as a cause or result of the head gasket failing.
If you decide to proceed, don’t skip any of the head gasket installation steps outlined below.
Step 1

How to Replace a Head Gasket
Raise your vehicle up on an automotive hoist, making sure that the arms of the hoist are resting underneath sturdy, load-bearing areas of your vehicle. Don’t get near your car when it’s on an automotive hoist, unless you are certain everything is secure.
Remove the battery to prevent accidents from occurring. Once the battery has been removed, drain all of the coolant out of the vehicle.
Step 2
Remove the exhaust pipes, air intake and the filtering system. Remove the air compressor and any other items in that region, to get them out of the way of your progress.
Step 3
Disconnect any attachments that are connected to the alternator and remove it. Remove the valve cover and its associated parts, such as the pushrods etc. Once again, if you have no experience and you don’t have the know-how to put these back together without looking at a schematic, you shouldn’t be attempting to do this yourself. Self-repairs likely will result in the destruction of your engine.
Step 4
Remove all timing components and remove the head bolts. Remove the head itself and check to see if it is warped, cracked or damaged in some other way. If it is, the head might need to be replaced as well, which is expensive.
Remove the old head gasket and clean off the area where it sits, making sure to get all of the scummy accumulation off of it.
Step 5
Following the manufacturer’s instructions, replace the old head gasket with the new one, making sure that it is lined up perfectly, because if it is misaligned, your engine could get ruined.
After securing the new gasket, re-assemble the engine in the opposite order from which it was disassembled, as the last step of learning how to replace a head gasket.
How to Replace a Head Gasket
It might only look like 5 steps to replacing a gasket on paper, but this kind of engine work is far more complicated than it reads above. This is going to be a time-consuming, tricky and dangerous operation on your car.
Instead of spending your time and money learning how to replace a head gasket and buying the tools to help you do so, I recommend using your time to make money to afford repairs, and using your money to hire a certified auto mechanic.
