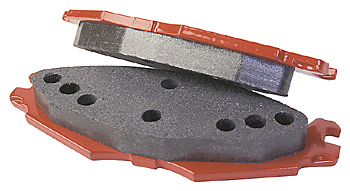
How to Replace Brake Pads
Given the high number of miles most people put on their cars these days, learning how to replace brake pads is a cost-effective alternative to paying a mechanic. Before learning how to replace brake pads, though, it’s important to note this process yourself is a dangerous activity. Have some degree of familiarity with automotive repair prior to an attempt to replace your brake pads or consult a mechanic or brake specialist if you have any questions or concerns.
Common indications it’s time to replace your brake pads include squeaking or grinding noises when you apply the brake pedal. If you notice a squeak or the sound of a grind anytime you come to a stop, you need to replace the brake pads on either your front or rear brakes – maybe both.
Brake Pad Replacement
The front brakes tend to wear out faster than the rear brakes do, so we’re going to focus most of our attention on that break problem.
Step 1
Secure the car on a hoist. Make certain the arms of the hoist are located on load-bearing areas of your vehicle. Using a torque wrench or a tire iron, take off one of the front wheels of the car. Be careful not to scratch up your rims when using the tire iron or wrench.
Step 2
Disc brake assemblies consist of a caliper, brake pads, a rotor and various pins used to hold the assembly together. When you hit the brakes, the caliper presses the brake pads against the rotor, which decelerates the vehicle and causes you to stop. Now that you have the pieces separated, familiarize yourself with where everything is.
The rotor is the big round piece of metal in the middle. The brake pads are attached to the caliper, which is on the outside. Undo the assembly holding the caliper in place. Remove the caliper from the rotor.
Step 3

How to Replace Brake Pads
After removing the caliper and brake pads, take a look at the rotor, to see if it’s damaged. If the rotor looks scratched up, take it to a brake service technician and ask if it needs to be replaced. Sometimes, rotors can be salvaged by turning it on a lathe to remove the scuffed up surface.
Step 4
Push back the piston to its original position, using a channel lock or some other device to get a good grip on it, before applying new brake pads. Put the rotor back on.
Apply a bit of brake pad grease to the back side of the brake pads. Don’t apply grease to the front, because that gets in the way of braking. Brake pads are attached to the caliper via a series of clips.
Break Pad Replacement Tips
As you perform your repairs, leave one front brake assembly intact, to refer back to, if you get confused. After you get the pads attached, slide the brake assembly back to its original state. Replace any other loose components in the reverse order of how you took them apart. Repeat on the other side.
Note that when buying new brake pads, rotors and such, it’s a good idea to bring your old ones in with you, so the salesperson can verify that the parts you purchased are compatible with your vehicle.
Always refer to instructions and defer to the information contained in them, if there are steps that conflict with those already outlined. Furthermore, when you’re still learning how to replace brake pads, always have your work inspected by a certified mechanic prior to driving the car. This helps avoid potential injury or property damage.
