How to Draw Naruto
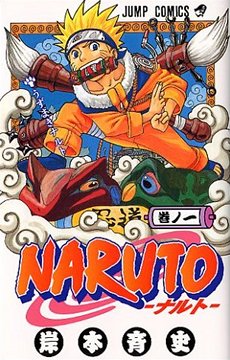
Naruto is a cartoon character beloved by kids because of his story — he’s a teenage ninja who’s trying to become the greatest ninja warrior in history. The Naruto series is long and complex — if you’re under the age of 12, you probably need no refreshers. If curious about how to draw Naruto, here’s how.
Drawing Naruto Cartoon Character
We’ve put together 5 steps for drawing the Naruto cartoon character.
Step 1
To draw Naruto, you should start by drawing out the basic guidelines and shapes of the Naruto character. The first step is to draw a basic circle for the head (more of an oval shape at the bottom for the jaw) and then add the facial guide lines. These lines will tell you where the nose, eyes, mouth, ears, and other features belong.
Step 2
Now we need to line out Naruto’s torso and arms. Naruto’s torso is sort of boxy and his forearm should be drawn in an oblong shape, including the right shoulder. Continue sketching by including the shape of his legs and feet. Naruto is known for his spiky hair, and you can go ahead and draw that in now — don’t forget the line for his bandana. Using the facial guide lines you drew earlier, add the eye lines and jaw lines. Once the face is prepared, sketch in his basic jacket lining shape to start forming his clothes. Jacket first, then pants.
Step 3

How to Draw Naruto
We’re starting to have a basic outline for Naruto — now it is time to draw more details on his eyes and his famous bandanna some more. Draw Naruto a smallish mouth line as well as his characteristic eyes. Now you can start adding detail to his clothes begin to sketch the complex shapes of his hands. Don’t forget his sandals — draw them in at first like socks.
Step 4
This is the step where we draw Naruto’s bandana in detail — find the Naruto emblem and draw it on the front of the bandana. Now draw in the lining for his ears and then add some of the lines on his face. By adding more detail to the mouth and drawing in the collar of his famous orange jacket, your character will begin to look like Naruto. Take it a step further and add detail to his sleeves such as creases and wrinkle lines — he’s an active guy, his clothes aren’t going to be too neat. Don’t forget the creases on his pants.
Step 5
Your drawing of Naruto is nearly done. You are on the last step, and it is time to finish the Naruto details. Simply sketch in a few specific details and add some definition to his body, shading for muscles, maybe even action lines for his legs. Don’t forget to finish details on Naruto’s collar. Finish the drawing of Naruto by adding cuffs at the bottom of his pants and of course the poor guy needs some toe nails. Don’t forget to erase all of the guide lines and guide shapes you drew to get you started.
