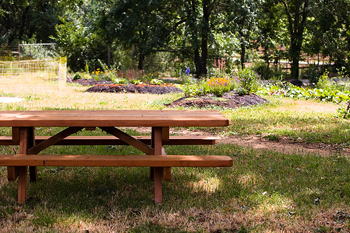
How to Build a Picnic Table and Benches
If you want to have a picnic table for cookouts and family get-together events, you don’t want to have to buy an expensive store-bought picnic table. Instead, learn how to build a picnic table and benches of your own, to save money you can use for one of those picnics.
To start with, your best option is to select 2×4 lumber to build your picnic table with benches. These are your main lumber options when building a picnic table and wooden benches.
Lumber Options
- CCA Treated Lumber – Insect and rot-resistant spruce, fir or pine, treated with cyanide salt.
- Redwood – Longtime favorite that costs a little more.
- Trex – A composite lumber comprised of wood waste chips and recycled plastic. Heavy, long lasting, maintenance-free and expensive.
Picking Out Two-by-Fours
Pick out the fourteen straightest pieces of 10-foot pieces of 2×4 lumber you can find at the store. You’ll turn these 10 2×4’s into the various legs, supports and connectors. Before you cut this lumber into a pieces, you’ll want to mark them, so you know where to cut and what you’re cutting.

How to Build a Picnic Table and Benches
Also, buy enough 2 & 1/2″ weatherized wood screws to complete the project. Once you have your lumber, here are the cuts you need to make to assemble your table.
- A – 6 Bench Slats – Cut six 60″ long pieces out of 3 of your 10′ long pieces.
- B – 8 Top Slats – Cut eight 72″ long pieces of our 8 other pieces from 8 more of your 2×4’s. This should leave 3 more 10″ whole pieces.
- C – 3 Connectors – Cut three 33″ long pieces from what’s left over from the top slats (B), which I might refer to as “B slats”.
- D – 2 Braces – Cut two 34″ long pieces from what’s left over from the B slats.
- E – 2 Top Supports – Cut two 31″ long pieces from what’s left over from the B slats. This uses 7 of the 8 pieces cut down from the top slats.
- F – 2 Connectors – Cut two 64″ long pieces from 2 of the 3 remaining complete 10′ 2×4’s.
- G – 4 Table Legs – Cut four 30″ long pieces, taken out of the remaining B slat 2×4 piece, the remainder of the two connector (F) lumber and the remaining full piece of lumber. Remember to get these precise, since legs off a little bit are going to leave an unsteady table.
This should leave you with a number of scrap pieces of 2×4: three 15″ pieces, two 14″ pieces, two 17″ pieces, two 18″ pieces, one 26″ piece and one 90″ piece. From these, you’ll need to eight 15 & 1/2″ pieces and four 12″ pieces of lumber.
H – 8 Bench Legs – Cut five 15 & 1/2″ pieces of 2×4 for your bench legs from your two 17″ pieces, two 18″ pieces and one 26″ piece. Then cut your remaining three 15 and 1/2″ pieces from your remaining 90″ piece of 2×4.
I – 4 Bench Supports – Finally, cut your four 12″ bench supports from the three 15″ pieces you have left, as well as the remaining 45″ of lumber you have left. This should give you everything you need from your 14 pieces of 2×4 lumber.
You’ll want to mitre saw (parallel cuts) on both ends the 2 braces (D), so these braces fit right. You’ll also need to mitre saw (undercuts) on both ends the top supports (E) at 45-degree angles, so you can attach them in a support position.
- Assemble a bench leg (H piece) to a bench support (I piece) so they form a “U” shape. Do the same to the other 3 bench supports.
- Assemble a table leg (G piece) to a top support (E piece) so they form a “U” shape. Attach the G-piece at the shorter end of the mitre cut. Do the same with another table leg and top support.
- Assemble the top support bracket (E piece) to an (F piece) so the outer edge is 20″ from the end of the connector.
- Secure a bench support bracket at both ends of the E piece, but make certain the pieces are flush.
- You need have both ends, so you can stand the two ends up as they would normally stand. Set the about 3′ from one another. This is a step having an assistant probably helps.
- Secure a 33″ connector (C piece) between each of the bench support brackets (I), which accounts for two of these C pieces. Attach the third C piece between the two E pieces.
- Make sure the picnic table/benches you’re building is at this point square. One you do this, attach each of the braces (D or 34″ inch pieces) to the center of the C pieces. You should be fitting the other end of the angled cuts on this piece, which should fit squarely at this point.
- Now it’s time to assemble the 6 bench slats, with 3 on either side. Place 3 60″ slats on each side of your bench assembly. Space them evenly and parallel, then use screw to hold them firm.
- Finally, add you tabletop pieces. Lay out your 72″ slats equidistant from one another on the top of the table brackets. Make sure the ends line up and attach with screws.
Building a Picnic Table with Benches
That’s how to build a picnic table and benches. There are a lot of pieces and some squaring you need to be certain about. Otherwise, all you have to do is select good lumber, making firm cuts with the saw and screw the picnic apparatus together. No one should ever know you didn’t buy it in a store, unless you decide to brag about your handiwork.
