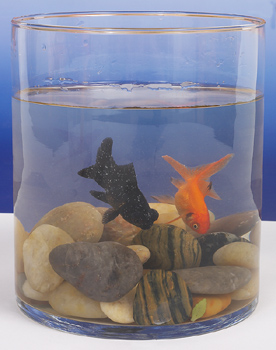
How to Build a Fish Tank
One way to save money in this economy is to make those household items you would normally buy in a store, so learning how to build a fish tank keeps you from buying a store-bought fish storage tank. Another advantage is the ability to make a custom-made fish tank fitted to your room, while also making fish tanks as large as you wish.
Building a fish tank requires the proper materials, but these are going to cost a lot less separately than all together. What you need are five pieces of glass, silicon sealant, acetone, silicon carbide sandpaper, and several household items like duct tape and paper towels.
Determine Size of Fish Tank
Determine the size of your fish tank, which also tells you how thick the tank walls need to be. You don’t want to get this part wrong, or else your glass could shatter, leaving your fish dead, your carpet ruined and a huge mess of broken glass.
To calculate the glass thickness you need, use the chart provided as a guideline for the thickness of aquarium glass you need.
Order from the Glass Cutter
Find a local glass cutter and place an order for five pieces of glass. This includes the bottom, the back and front walls and the side walls of the aquarium. You should have your calculations ready, so ordering glass sides should be simple.
Sand the Rough Cut Glass
Use silicon carbide sand paper or emery cloth to sand down the glass edges of the glass you receive. Be careful transferring these glasses pieces from the glass cutter to your car, and from your car to your home. The edges are going to have a sharpness to them, which is a major reason why you’re going to want to sand them down.
Once this is done, mark the 5 pieces of glass as to which are going to be the bottom and the sides, using a simple felt-tipped market. Make certain you can later remove the black markings.
Building an Aquarium
Tear off roughly 15-20 five to six inch strips of duct tape, then touch them lightly to your work table, so you can use them later quickly and with ease. Start with the bottom piece of glass in your aquarium, with the inside of the fish tank facing up.
Use acetone around the edges of this glass piece. Acetone is a flammable organic compound that is the active ingredient in paint thinner and nail polish remover. You can use acetone to clean the surface of your glass, making it easier for the silicon sealant you’re about to apply to work.
Place Duct Tape on Aquarium Bottom

How to Build a Fish Tank
Fix 8 strips of duct tape to the bottom of your fish tank, so that enough of the tape is sticking out and up, that you can later affix it to the other pieces of glass. Place two strips on all four edges of the glass, equidistant apart.
The duct tape is going to keep your glass tight and secure while the sealant works to cement the glass sides together. Once the process is finished, you’ll take the duct tape off (that’s later, though).
Affix the Front to the Fish Tank
Take the front piece of the fish tank, determine which side you want to face out and spread a sealant bead along the length of the bottom of the aquarium, along the side you determined to be the front piece.
Collect the front piece of glass and press it firmly onto the silicon sealant. As you do this, take the two front pieces of duct tape and fix then to the front glass. This should help hold the front to the bottom of the fish tank, while the sealant works its magic.
Add the Sides to the Tank
Next, add sealant to the left side or the right side of the bottom glass – whichever you want to attach next. Follow the same step with both sides that you did with the front. Press firmly against the side, then fix duct tape to help the two glass pieces together.
Continue doing this for all four pieces of wall glass, doing the front, then the two sides, then the back wall of the fish tank. Once you perform this task, the form of your aquarium should come into shape.
Add Sealant to the Inner Lining
Now that you have the aquarium walls in place, add sealant to the inner lines of the fish tank. Do this with the inner lines where the four wall pieces connect to the bottom of the tank horizontally. Then do the same where the four walls connect to one another vertically.
You should now have sealant holding all the pieces of the aquarium together. The sealant is not only is what cement the fish tank, but holds water inside. Let the sealant dry for 24-36 hours before doing anything else with your fish tank.
Filling the Aquarium
After your sealant has dried, fill your fish tank with water. For the next 24 hours, check to see if there are any leaks forming along the joints of the fish tank. If no leaks appear, you have built your fish tank and it’s time to add fish, rocks and anything else to make your aquarium a pleasant and healthy environment for your fish, while making it striking for your guests.
Make Your Own Fish Tank
Learning how to build a fish tank may not give you a huge cost advantage over store-bought aquariums, but it does let you to custom build fish tanks to your home, office and surroundings. Understanding how to make your own fish tank also gives you the advantage of understanding basic fish tank repair.
